
Disclaimer: The content on this page should be used at your own risk. I do not support copying rented or borrowed movies. I use this for my 2 year old son, who is in love with Shrek and Nemo. It's a pain in the ass to keep swapping DVDs, so I put both movies on 1 DVD. I also use DVD Shrink to back up my own movies.
There are a lot of places that buy used DVDs, I will copy an original, that I purchased, then sell or trade the original to one of these stores. I am not sure if this is illegal, but in my opinion, I purchased the DVD, so I should be able to make a copy for myself. I am not downloading ripped movies or music.
Oh well, off my soap box and on with the lesson...
The following has been copied from another web site. This is a link to the original post
You will need DVD Shrink to perform the following actions
NOTE: There are a million different ways you could do this, this way is just 1 to get you started. Explore the options you could do, it will amaze you of the endless possibilities. By no means, am I suggesting that you follow this tutorial for every 2 disc DVD set or 2 separate DVD you wish to fit on 1 DVD-R! Every movie is going to be different.
ALTERNATE METHOD
*** DUE TO NEW COPYRIGHT PROTECTION, DVD Shrink CANNOT HANDLE/OPEN NEWER DVD TITLES (THE GRUDE, FORGOTTEN, ETC.), MEANING YOU FIRST HAVE TO RIP THE DVD WITH DVD Decrypter 3.5.4.0 . IF THAT IS THE CASE, YOU WOULD CLICK THE "OPEN FILES" BUTTON, NOT THE "OPEN DISC" BUTTON. (IF YOU RIPPED TO A ".ISO" FILE WITH DVD Decrypter, YOU WOULD NEED TO HIT CTRL+I TO OPEN THE .ISO IMAGE WITH DVD Shrink. BASICALLY, WHEN I SAY "INSERT THE DISC", THAT WOULD ALSO MEAN "OPEN FILES" OR "OPEN DISC IMAGE/CTRL+I". THIS GUIDE WAS INTENDED AND ILLUSTRATED FOR "FILE" MODE IN DVD Decrypter, NOT "ISO" MODE.***
( *** = ALTERNATE METHOD )
Open up DVD Shrink. Insert the first disc (***). Let it do a quick analysis. After the quick analysis is done. Go ahead and deselect all of the stuff you don't want (Foreign languages, certain extra titles, etc.).
Click the "Backup!" button. (Proceed as you normally would when backing up a DVD,)
After it gets done encoding the 1st disc, and DVD Shrink is through. Go ahead and insert the second disc(***). Do the same thing as you did for disc 1.
Click the "Backup!" button. (Proceed as you normally would when backing up a DVD)
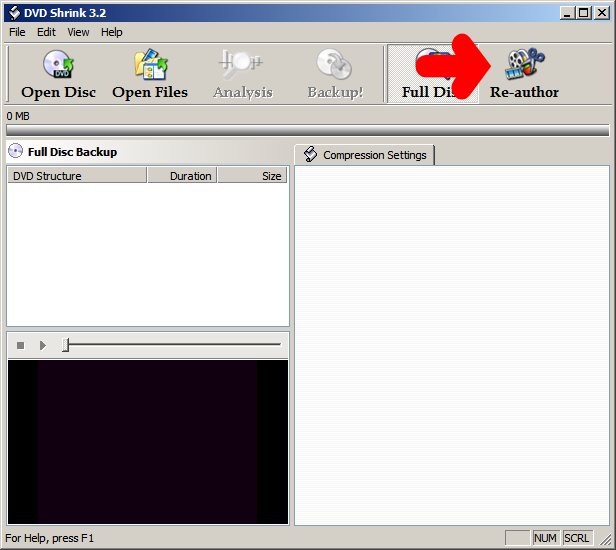
After successfully backing up both disc 1 and disc 2. Go ahead and start up DVD Shrink again. This time click the "Re-author" button. Screen Shot Below:
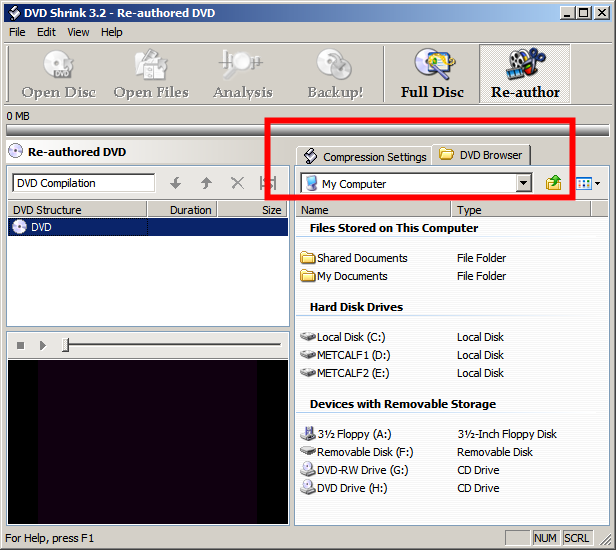
On the right side of the "Re-authored DVD" screen, there will be two tabs. "Compression Settings" & "DVD Browser". Screen Shot Below:
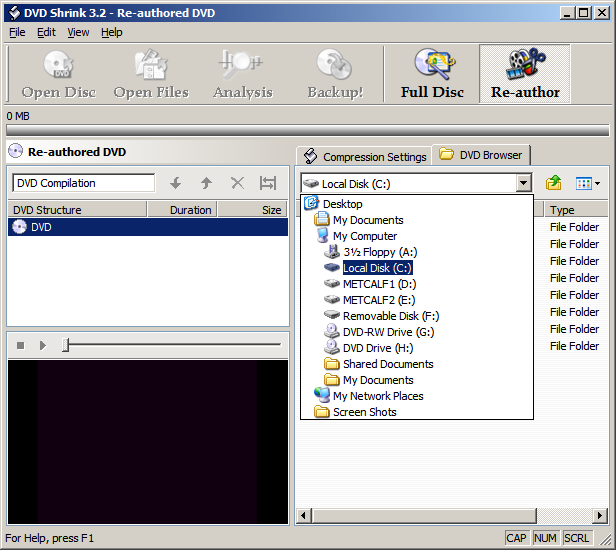
On the "DVD Browser" screen, click the down arrow at the end of the directory box, and navigate to where ever you saved the file or files that DVD Shrink created for you on the first disc. Screen Shot Below:
Drag them over to the "Re-authored DVD" section, located on the left hand side of the main DVD Shrink screen.
After adding all the titles that you want from disc 1. Go ahead and click the "DVD Browser", then navigate to where ever you saved the file or files that DVD Shrink created for you on the second disc.
After that, drag the files from disc 2 under the file you dragged from disc 1.
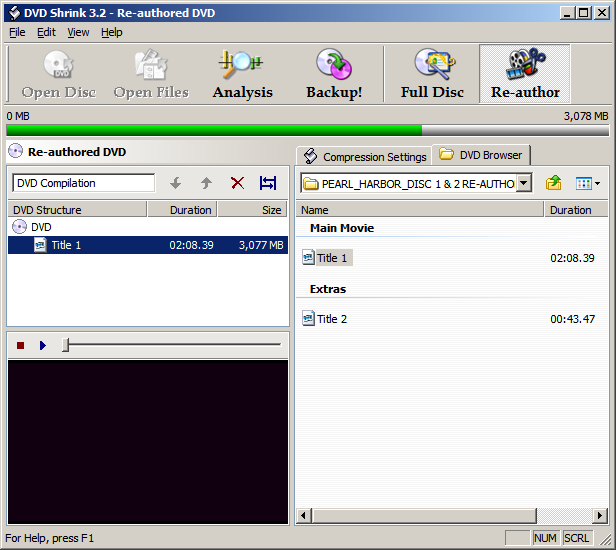
After you have dragged all the "titles" you want on the "Re-authored" DVD. Go ahead and click the "Compression Settings" tab. Here you will be able to see how much compression if any, is going to be needed for the "titles" all to fit on 1 DVD-R. When you are satisfied with the compression rate, go ahead and click the "Backup!" button.